

Manual
-
Video tutorial
A quick introduction for Knovelty (in German). Don't forget to select HD video quality.
-
Navigation Bar

The Navigation bar represents the central menu in knovelty. It contains (from top to bottom) the following elements:
Start button (House): The Start button is used to manage the current project. Here you can open files, save, change settings etc.
Scene menu (Clapper board): Leads to an overview of all chapters and scenes in the current project. If no project is opened, this button is inactive.
Background information (Circeled i): Here you can manage all background information and notes. If no project is opened, this button is inactive.
Tools (Spanner): Useful tools and statistics. If no project is opened, this button is inactive.
Settings (Gear wheel): Here you can change all settings concerning Knovelty itself and its behaviour. If you want to change project settings, use Start -> Project settings.
Below, you find the statistics area (invisible if no project is opened). It provides information on writing activities and basic data concerning the current project. Use Start -> Project settings to enter the underlying data.
Words today: Shows the number of words you added today.
Total words: Shows the number of words in the current project.
Daily goal: Shows the number of words you have to write each day to meet the deadline. In brackets you see your average daily word count.
Total goal: Shows the total number of words you want to achieve.
Deadline: Shows the estimated completion date.
Use the save button to save the current project. It always works, no matter which submenu you look at. You can also use CTRL+S to save the current project. A short sound confirms the success of the saving operation.
At the bottom you find the Version info.. It shows which version of the program you use. This is especially relevant for testers or if you contact our support. A higher number means a newer version of the program.
-
Settings
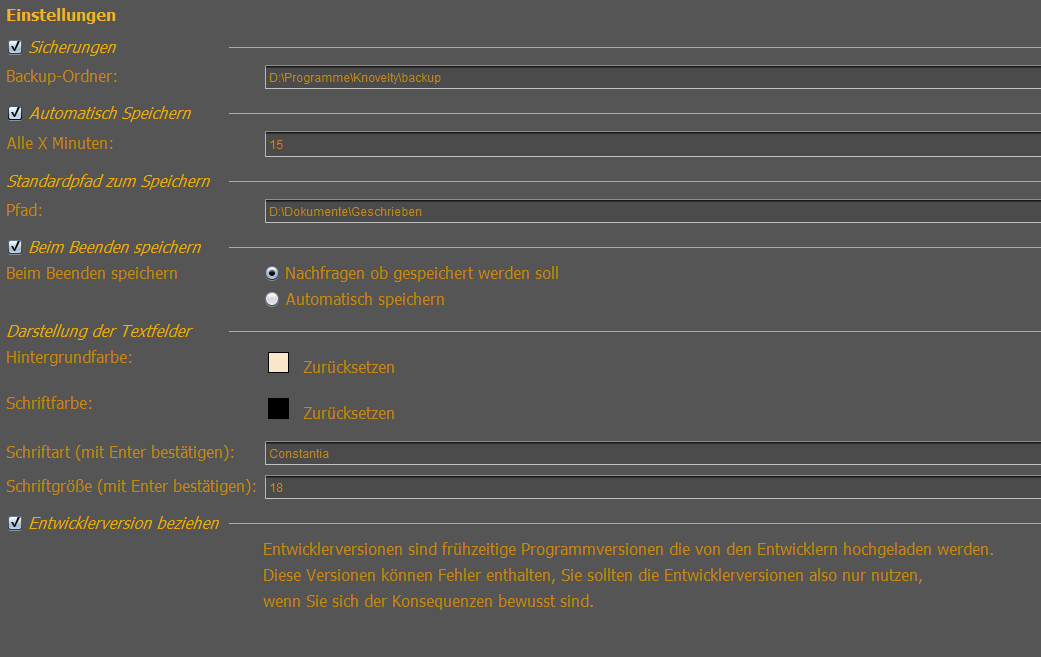
Here you can change all settings concerning Knovelty itself and its behaviour.
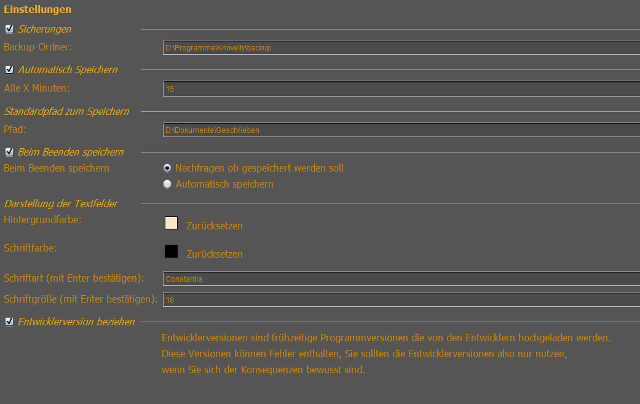
SettingsAuto backup: Enabled: Knovelty automatically saves multiple copies of your projects to reduce the risk of data loss. If you accidentally delete your project or lose it due to technical problems, this option provides a backup.
Click on the file path next to Backup Folder to change its location on the drive. We recomment using another hard drive (e.g. an external one).Auto Save: Sometimes you forget to save your project, the PC crashes and lose the work of hours. To prevent this issue, enable this option. Knovelty will save your project automatically at regular intervals. You can enter the time interval here.
However, don't stop saving manually!Default Path: The file browser will start in this folder if you want to open or save a project. Use the folder where most of your projects are located. This is a pure comfort setting.
Save at exit: Knovelty saves your project every time you exit the programm or it asks each time if you want to save.
Text Field Color: Changes the color of some text fields. (Not the scene text fields). Just click on the box and choose a color. Click restore to get back the default color.
Fonts and Font Size: Default setting for new scenes.
Developer Version: Enable this to get untested updates. Attention! These versions may contain bugs that affect the programm's stability and might even lead to data loss!
If you find an error in the programm, please contact us and refer to the version number. This way you can help us to improve Knovelty. -
Start
The Start Menu is used to manage your projects
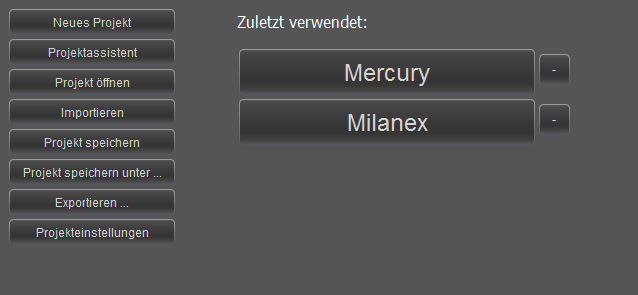
Start MenuBelow Recent projects Knovelty shows the projects you were recently working on. Click on a project's name to open it.
The small minus button deletes a project from the list. It does not delete the project itself!New Project creates a new project.
The Project Assistant also creates a new project. It offers control over certain parameters. For example, you can generate a number of chapters and scenes right from the start.
Chapters are used to structure your novel. They do not contain text, just multiple scenes. Only scenes contain text.
For example, if you want 4 chapters with 3 scenes each, you get 12 scenes. You can change the number of chapters and scenes later on as well.
The rest of the settings can be changed via Start->Project Settings later on. Refer to the respective chapter of the manual to learn what they do.Open Project Opens a Knovelty Project on a data storage medium. A Knovelty Project consists of a project file (.kno) and a project folder. The folder contains all of the scenes in .rtf file format. Open a project by selecting the .kno file!
If you have worked with yWriter before, use Import to load the YWriter Project into Knovelty. Knovelty transfers scenes and background information automatically.
Save Project (only available if a project is opened) save the current project. If you save your project for the first time, enter a name and choose a file path. The file name is independant of the project's name in Knovelty. Afer you saved it once, Knovelty will save your project in the same location (overwrite it) everytime you click the Save Project button. This button is identical to the Save Project Button in the navigation bar. You can also press CTRL + S to save your project. You will hear a short confirmation sound.
Select Save Project as (only available if a project is opened) to choose a new file path and name.
Select Export (only available if a project is opened) to save a copy of your project in another file format. You can choose from HTML (Website), RTF (similar to a MS Word document, can be processed by almost every word processing programm) and TXT (plain text, text formatting will get lost).
You can select in detail which chapters, scenes and background information you want to export.
Select Project Settings (only available if a project is opened) to chance settings of the current project. These settings do not change the behaviour of Knovelty as a programm!
Project Name: The title of your novel. There is no connection to the file name of your project file.
Author: Your name / the pseudonym you use for this novel.
The following settings are used to calculate the progress statistics.
Project start date will be generated automatically and does not have to be changed. Exception: You create the project file, but start working days or weeks later. In this case you can use this setting to correct the corruption of the statistics.Here you can enter two of three target values (Words per day; total word count; deadline). The third one will be calculated and will adapt to your writing progress. It will be highlighted with a white background. Enter all dates in DD.MM.YYYY format. Always confirm your inputs by pressing ENTER/RETURN
-
Scene menu
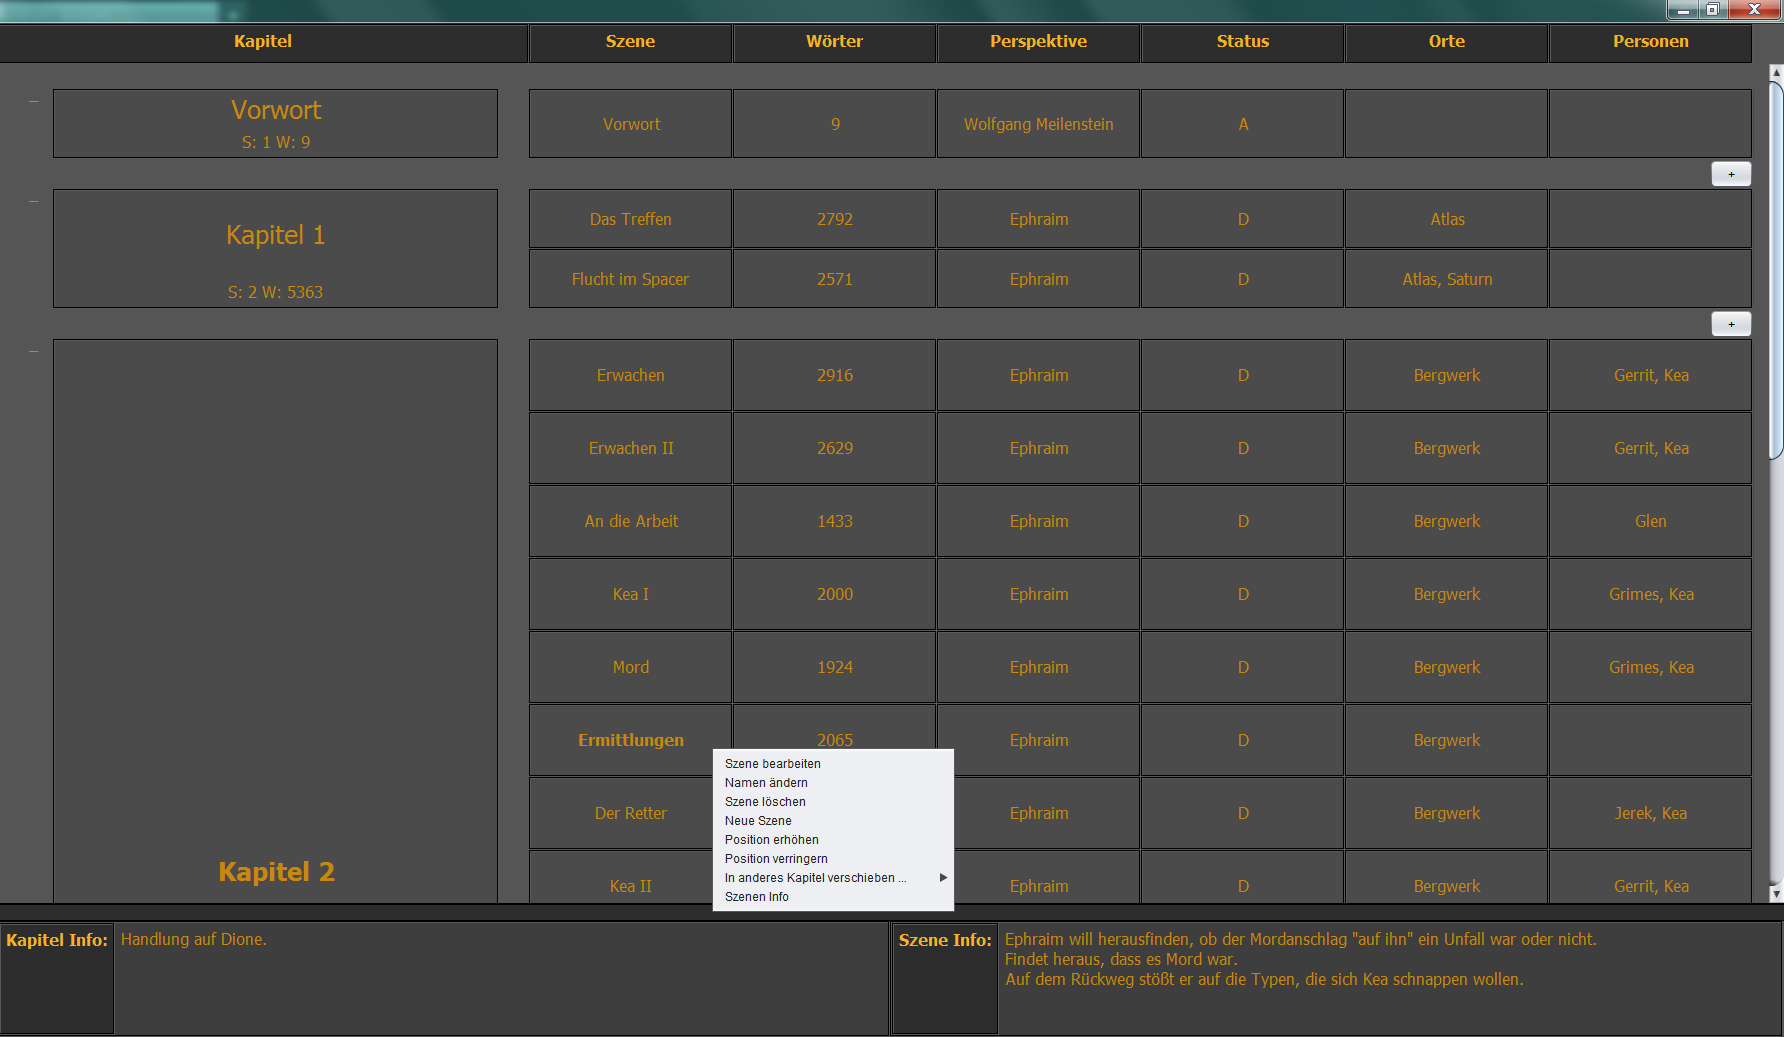
The scene helps you to manage your book's chapters and scenes.

Scene overviewYou can add chapters (left) and scenes (right) with the plus button.
Chapters help you to structure your project. They contain scenes but no text.
In dem Kasten wird der Name des Kapitels angezeigt, außerdem die Anzahl der enthaltenen Szenen und Wörter.
With a right click on a chapter you get some options to manage your chapter.
Scenes can only be created inside of chapters. They contain the text of the project. With a double click a scene can be opened, a right click displays some management options.
In a table many important background information are available.
Get more explanation for that at the topic Edit scene.On the bottom border of the screen there are the two fields Scene information and Chapter information. Especially for large projects these fields are important. Short summarys about the scenes and chapters can be inserted at this place. So the overview can be kept and you can find text pieces you are searching.
With a double click into the field the texts can be edited. With Return you can take over the changes (the field is going to get darker), you can add a line break with Shift+Return.
Besides the fields can be edited, if you do a right click on the scene or chapter and choose Chapter info or rather Scene info. -
Edit scene
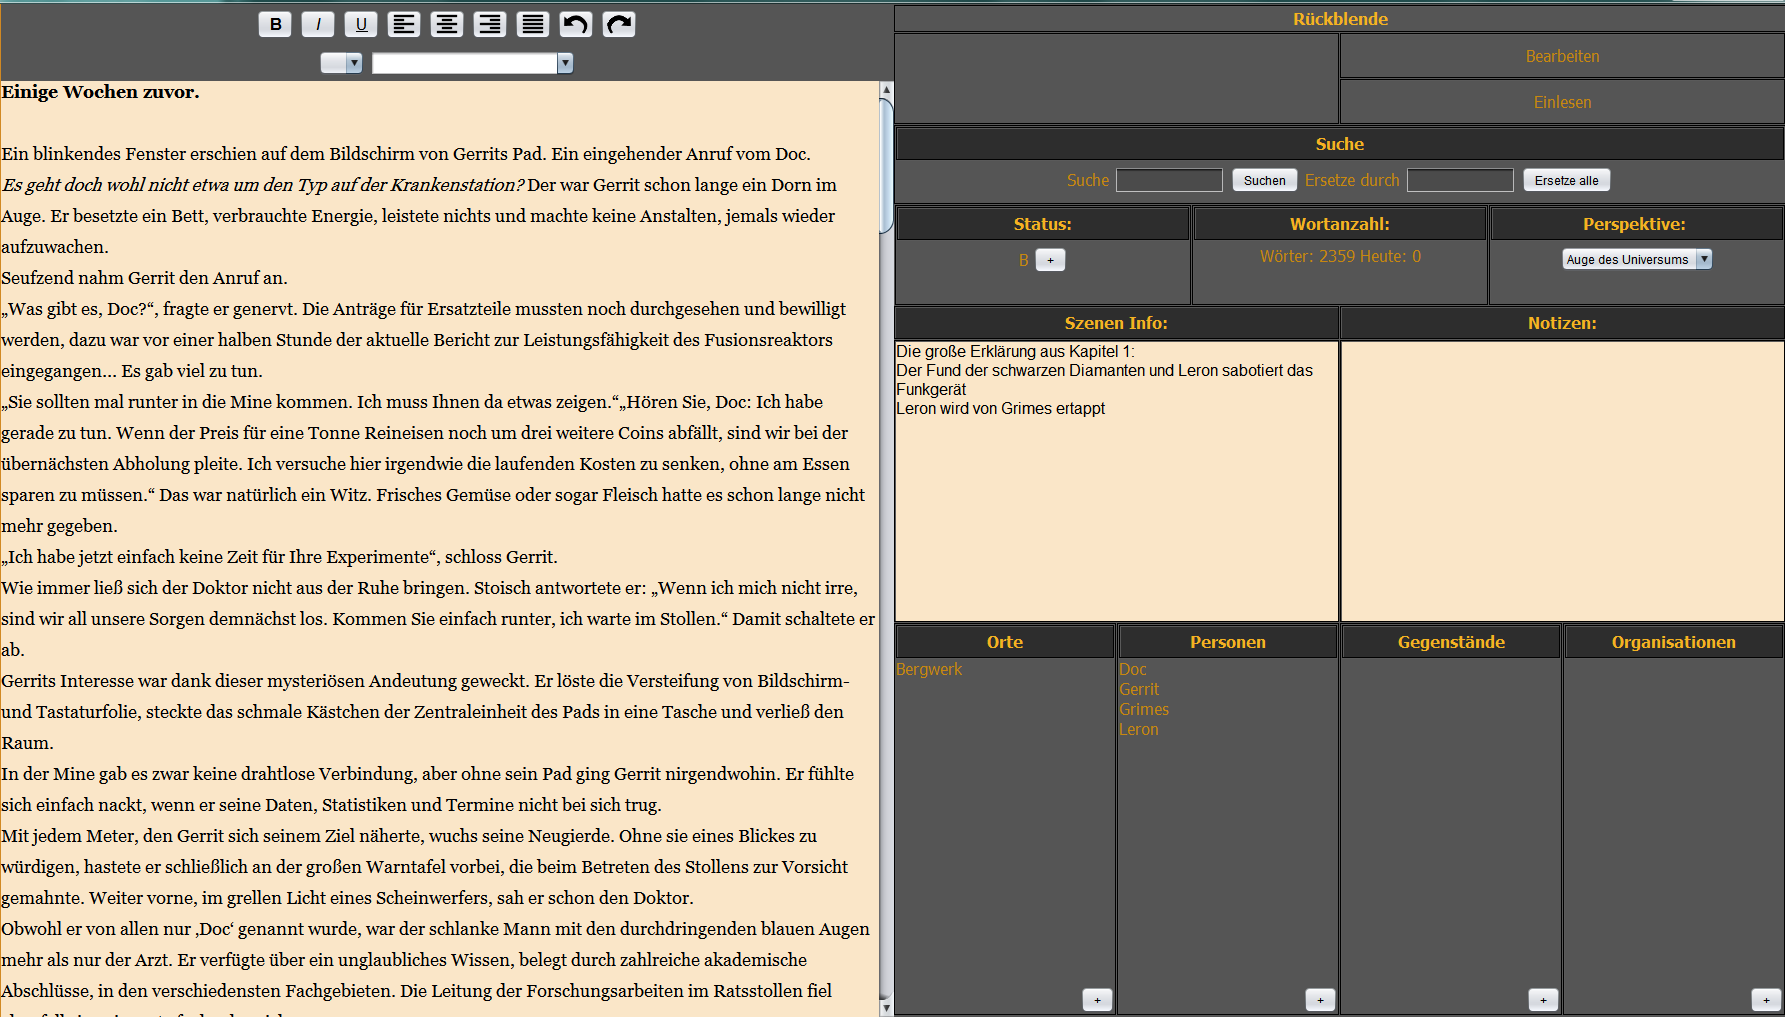
Scenes can be opened in the scene menu with a double click. Here the actual text can be written.
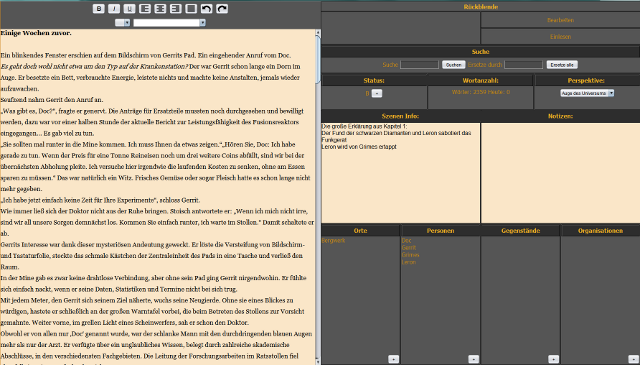
Edit sceneThe text input field does work like you are used to from a text processing program. Just type in some words. Whatever you are typing here will always be saved, you don't have to click on something like "save scene".
Above the text field there are some basic instruments to format the text.
With the arrows you can withdraw individual operations (arrow back or Ctrl+Z) or recap them (arrow forward).If you want to edit the opened scene in an external program (e.g. Word, to use spell checking), you have to click on the top right Edit. The scene is going to be openend in the program that is assigned to the file type .RTF. When you have finished the editing in the external program, just save the document (do not choose an other file path) in the external program and close it.
With the button Import (in Knovelty) the edited scene will be imported into Knovelty.
Important: This functionality does require some attention. Don't write in Knovelty as long as you have opened the scene in an external program. Write again in Knovelty after importing the scene correctly. Otherwise you may lose your written text!
Hints and messages do warn of inaccurate use – But please stay attentive!The Search helps to find an inserted search term. With a click on Search (or the key F3) you jump to the next occurance of the search term. Search items don't have to be whole words, the search is not case sensitive.
Replace all: Replaces the words you have inserted at Search with the ones that were inserted in "Replacement" within the opened scene. For example this may be helpful to change frequent used names later on.
This functionality is case sensitive.
ATTENTION This function does whatever it is told and can not be undone. Please use it carefully. For example if you replace the word "on" with "onto" you will also replace "reckoning" with "reckontoing".A Status can be allocated to a scene with the + button. You can choose between a default status (A till Final) or insert your own status like "Not proofread yet!" or "Revise dialogues".
With the dropdown menu Perspective you can choose from whom's perspective this scene is written of. You can choose from your created persons. You can read about how to create persons at Background information .
In der geöffneten Szene können Sie ebenfalls die Szene Info bearbeiten. Außerdem steht ihnen noch ein zusätzliches Feld namens Notizen für weitere szenenbezogene Informationen zur Verfügung.
Places, persons, items and organizations are Background information. With a click on the relevant + buttons they can be assigned to a scene.
You can choose an existing entry or create a new one.
So you can easily choose which persons, places ect. appear in which scenes.
With a double click the item can also be edited out of a scene. A right click on an item does offer some more options.
For example you can delete the connection to the opened scene or completely delete the item out of your project. If you remove the connection to the scene, the person will not be assigned to the scene but will still be available in the list at Background information . If you choose Delete the item will be gone irrecoverable. -
Background information
In the menu Background Information you can manage persons, places, items, organizations (entries) and (scene independent) project notes.
This menu is sort of a "database" to your novel.Entires are listed on the left screen side according to their categories.
The right screen side is splitted into three parts.
On top there your notes are shown. Here you can note everything that is important for your project but cannot be conneected to any specific scene. Examples: Time lines, a planed progress of your story line, currencys etc.
The middle presents your preview area. If you select a note or an entry with a simple click, the content will be shown here. This area is read-only, it just serves as a view. The content cannot be edited!
If you have connected your entires to several scenes, these will be displayed on the bottom right. With a double click you open the selected scene for work. So you see at a glance in which scenes your selected entry does appear – and can edit this scene without any detour via the scene menu.
Entires and notes can be created with a click on the plus button. To remove just do a right click and select the appropriate subitem. Sometimes the right click offers some more options.
With a double click you can open entries respectively notes for editing.
notes do just contain a name and simple text.
Entires do offer some more functions. For example you can add a full name or create more work sheets (click on the plus button next to default). With the tabs above the text fields you can switch between these work sheets.
Left to the text field there are all scenes listed that you opened entry is allocated to.
On the right side your entry can be connected with other entries (plus button) respectively it will be shown which connections do already exist. Connecting the entries does operate in both directions.
Example: You have the person "John" allocated to the place "Berlin". Now if you open Berlin, "John" will also be shwon. Connecting does work like in a scene. -
Tools
Knovelty does offer some useful tools.
Globales replacement: Replaces the string you have entered after "Term" with the one you entered after "Replace with" in all scenes. For example this may be helpful to change frequent used names later on.
This functionality is case sensitive.
ATTENTION This function does whatever it is told and can not be undone. Please use it carefully. For example if you replace the word "on" with "onto" you will also replace "reckoning" with "reckontoing".Statistics (diagram): Shows in a bar graph on which days you wrote how many words.
Statistics (table): Shows in a table on which day you wrote how many words.
Weekday statistic: Show in a pie chart how many words were written on which week day. (Refers to the whole period of the project and not to the current week)